
Starting a new business or a blog?
Is your current corporate website in need of a serious revamp?
I have good news for you.
You don’t have to spend thousands of dollars on a Professional Website Design Agency in Singapore to build a website.
Of course, don’t expect the amazing designs and customizations that an agency can help you with.
If you want to know how much designing a website costs, especially in places like Singapore, try doing a search for “Website Design Singapore“, and contact the agencies on that list.
Designing and developing a custom made website takes time and patience, and involves a fair bit of research.
Let’s get started.
Firstly, You Need To Register A Domain Name and Get Your Hosting
For those of you who don’t know what a domain name is, this is a domain name –> www.eastsidemafia.com
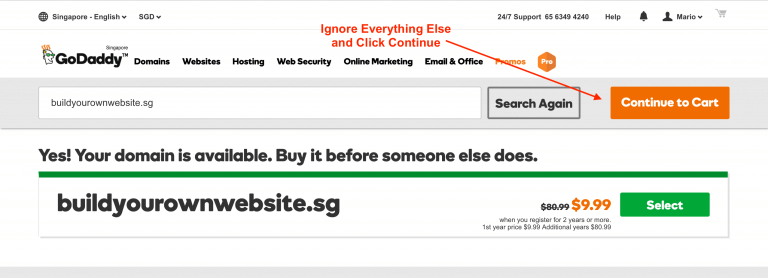
Simply go to Godaddy.com, and search for your desired domain name.

Once you’ve decided on your desired domain name, proceed to register the domain name.
Please take note of the following:
- For .sg domains, you will need to provide your NRIC number, and validate with Singpass later on
- For .com.sg domains, you will need to have a registered local company in Singapore
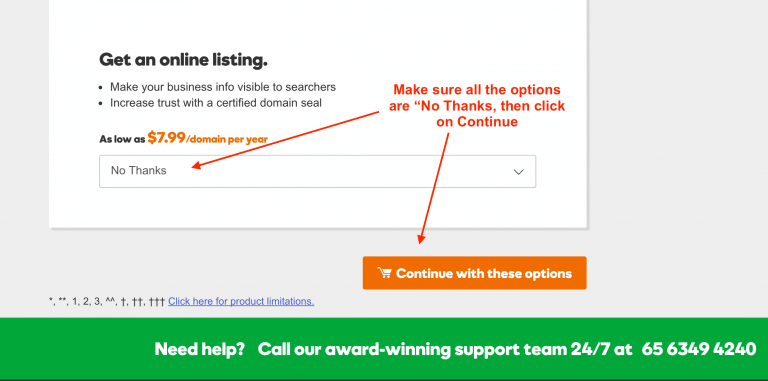
Godaddy will prompt you to buy a hosting for your domain in the next step, along with a few other options.
Make sure everything is set to “No thanks”, scroll to the bottom of the page, and click “Continue With These Options”
We will settle the Website Hosting later on, as Godaddy has one of the worst customer support out there.
You will be required to sign in and create an account on the next page, go ahead and do so.
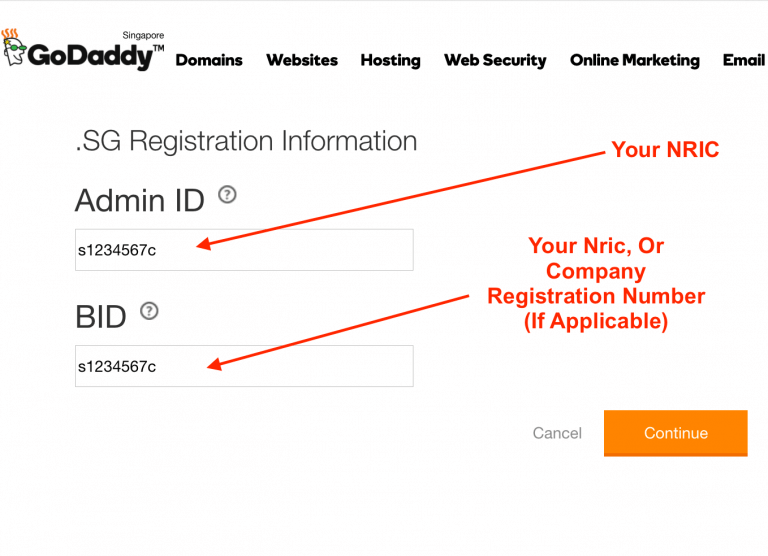
The next step is to provide your Identification – Either NRIC or ACRA number.
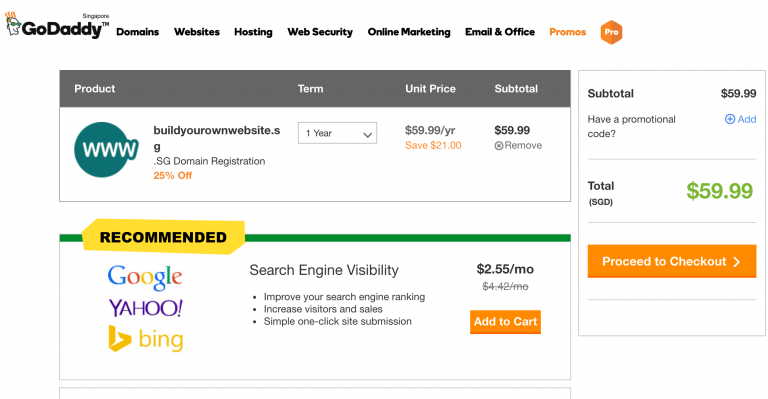
We’re almost there, go to the next step, and Proceed to checkout.
Make sure that any unnecessary items are unchecked, a simple .sg domain should cost you about $60 per year.
Congratulations! You now have your own domain name!
Now, for the hosting.
Please bear with me for this extra step, which will save you hours and hours of wasted time waiting for the Godaddy support team to assist you with your hosting.
This is of course, my personal preference, and you’re free to choose your own hosting.
My hosting company of choice is definitely Bluehost, and i’m now going to guide you on how to setup a simple hosting account with Bluehost for about SGD$8.50 per month(1 Year).
The longer you sign up, the cheaper it gets.
Furthermore, they offer a 30 day money back guarantee if you’re not satisfied with their services!
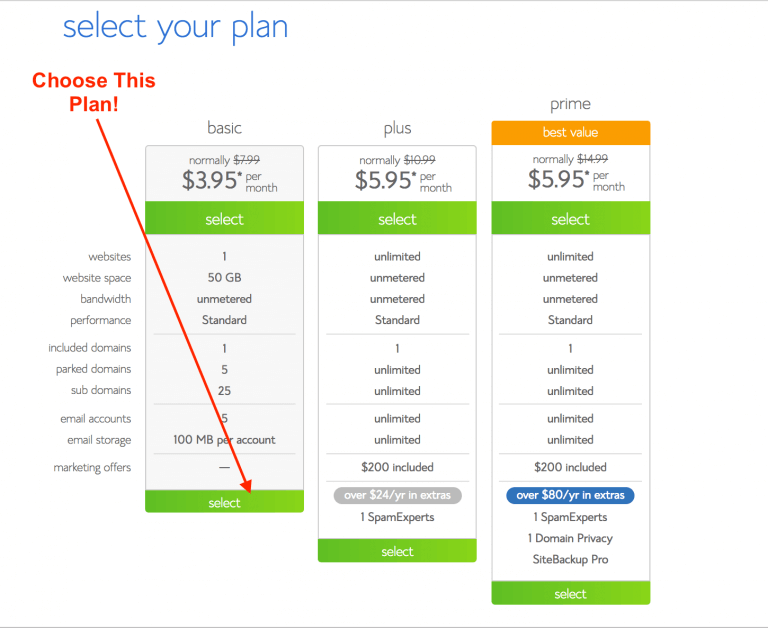
Simply go to Bluehost, click on “Get Started Now”.
In the next screen, select the “Basic Plan”
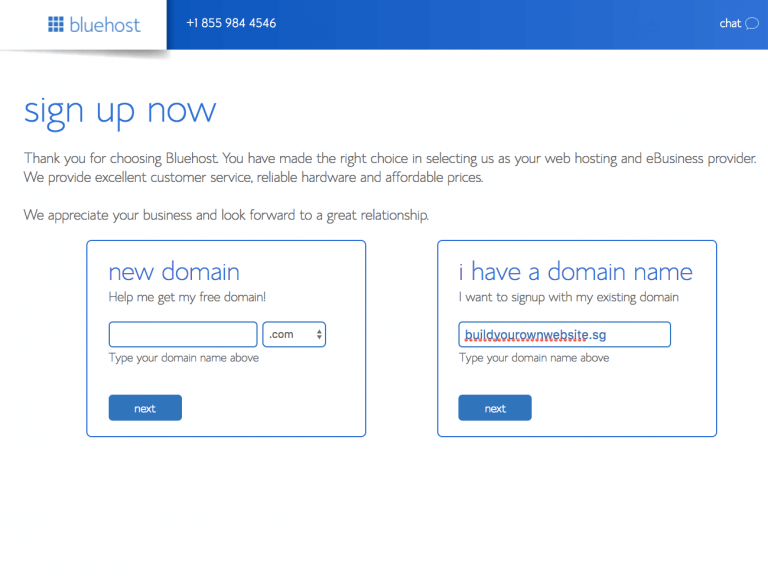
In the next step, input the domain name that we’ve bought previously, into “I have a domain name”, and click next.
Create an account, make payment, and now you have a great place to host your new website!
If you’re wondering, now my domain name is in Godaddy, and my hosting is in Bluehost, how am i going to connect both of them to each other?
Don’t worry, this is a very simple step that i am about to show you now.
The Steps Are As follows.
- Login to Your Godaddy Account
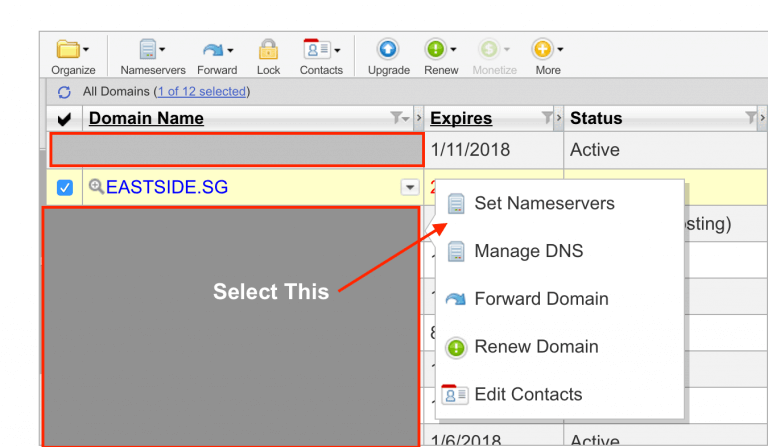
- Go to “Manage My Domains
- When you see your domain, click on “Set Nameservers”
The Next Screen will show you your existing Nameservers, which are pointed to Godaddy’s servers by default.
What you need to do is edit them, and change them to Bluehost’s Nameservers.

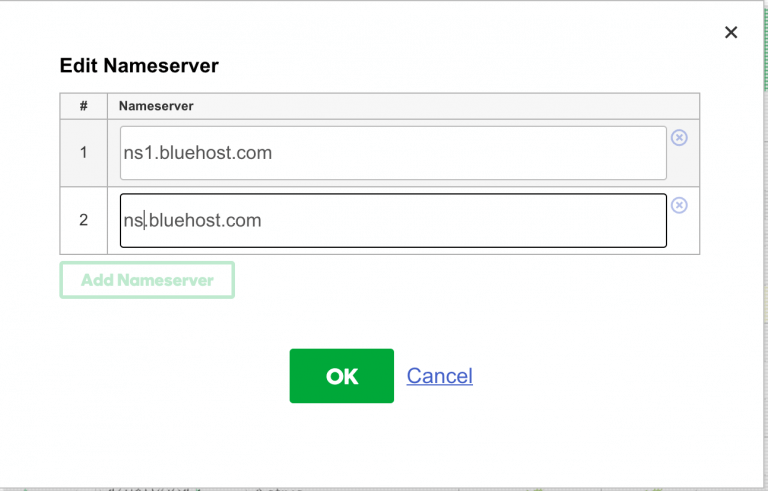
The final step, change the Nameservers to
- ns1.bluehost.com
- ns2.bluehost.com
Now you have a domain and hosting, and you can start building your website!
Installing WordPress on Your new server.
Now it’s time to install WordPress on your new server.
Don’t know what WordPress is? Doesn’t matter, just follow my steps and you’ll have your website in no time.
In Bluehost, under the hosting Tab, click on “Home” — > Website — > Install WordPress
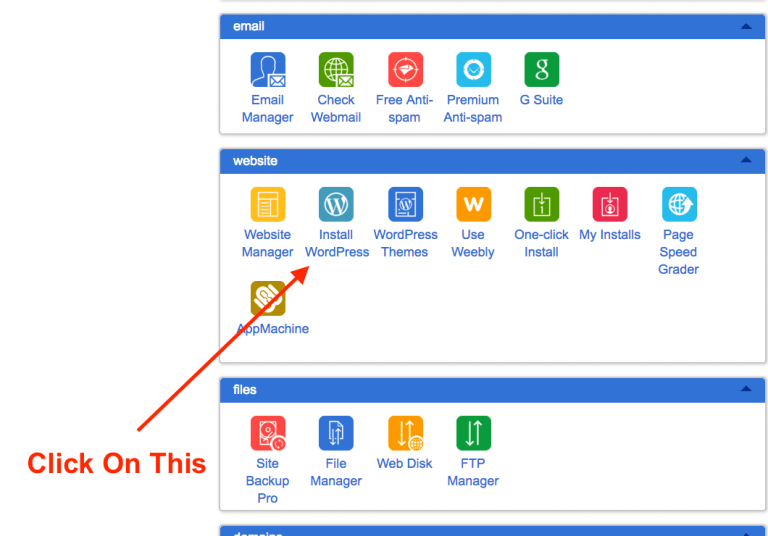
In the next screen, “Welcome To Bluehost Marketplace”, just click “Get Started“.
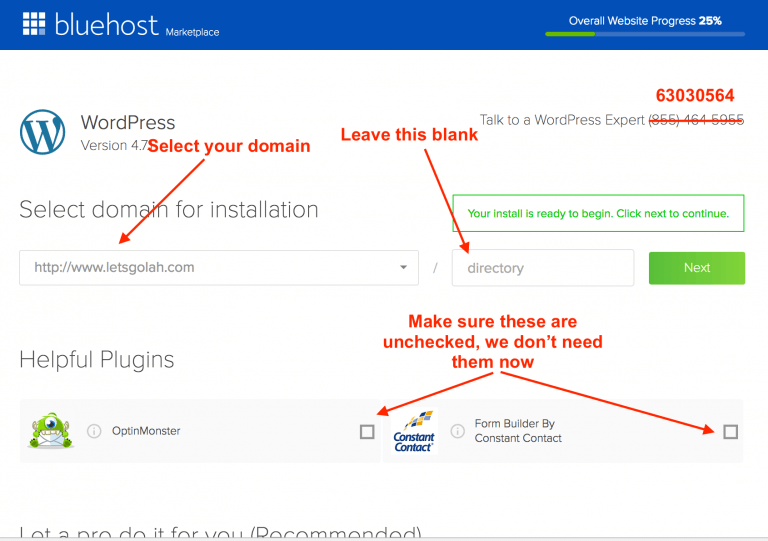
You’ll be led to a screen that looks like the one below.
Select your domain name that you’ve just registered, make sure all the other boxes are unchecked, leave the directory empty, and click next.
Now, enter your new website name, your email address, your username(your choice), and password(choose a strong password). Remember to check all the boxes.
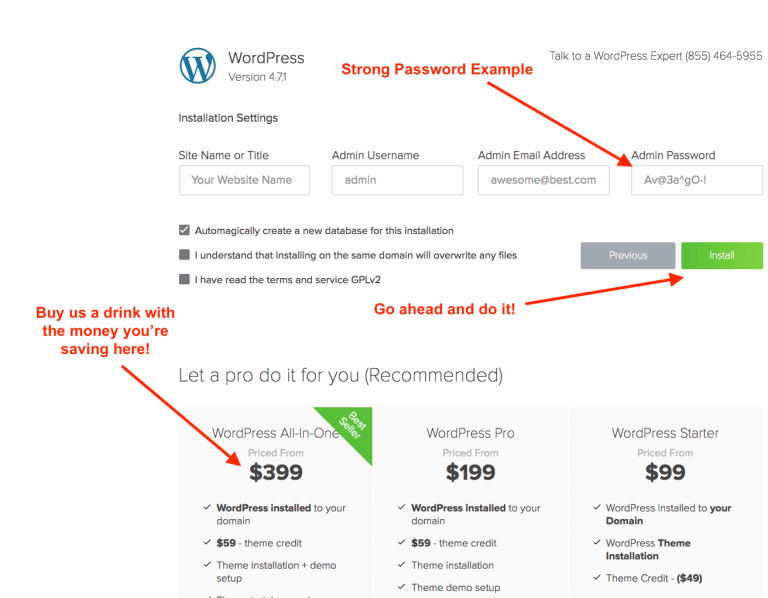
That’s it!
You now have WordPress Installed on your website, and we’re really close to seeing a Real Website Being Built.
Searching For A Theme, And Installing It On Your Website.
Now you’ve installed WordPress on your website, if you go to your url, it should look like this.
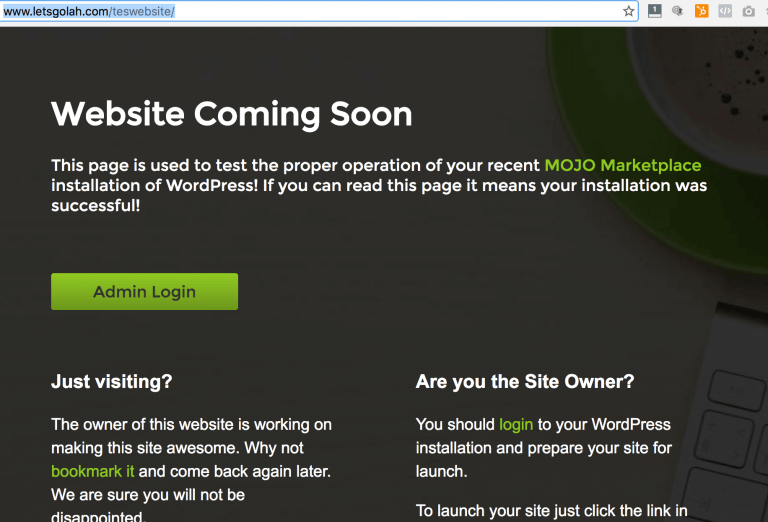
Congratulations! You now have a Basic Website that loads and is displaying to the world!
Now you need to customize it.
Open a new tab, and go to “www.yourwebsitename/wp-admin”
Once you’re there, you should see a login page that looks like the one below, enter your username and password, and you will go to the WordPress Dashboard.
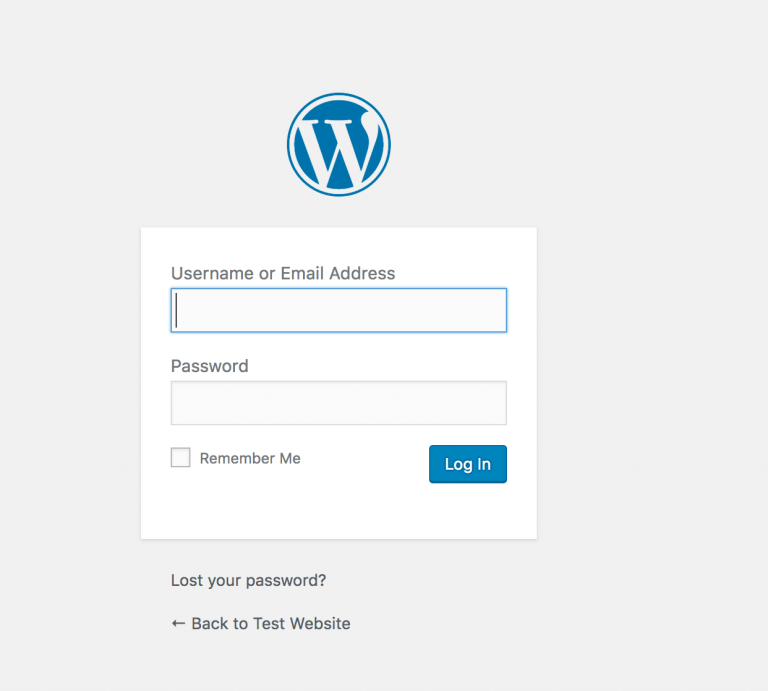
This is the control centre of your new website.
From here, you can change almost anything you’d like if you have the expertise, which is easily available online.
IMPORTANT: This Guide Is Only For A Basic Website With Minimal Functionality, For Complex Corporate Websites, please Contact A Website Design Agency in Singapore.
Now you need to select a Theme, or Template for your new website.
For this guide, we’re going to be using the Onepress Theme.
You can view how the layout looks like HERE.
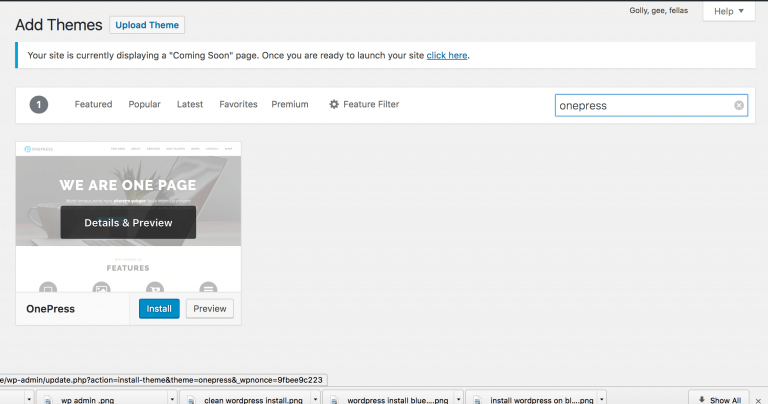
In your WordPress Dashboard, go to Appearance –> Themes –> WordPress.Org Themes(Top Left Screen).
Next, search for “Onepress”.
Hover your mouse over the theme, and click install, then click Activate.
Customizing Your Theme
Your theme has now been installed, a few more steps and you’re going to have a professional looking website.
In Appearance —> OnePressTheme –> Actions Required

Do the following:
- Install and Activate Contact Form 7
- Install and Activate Famethemes Demo Importer
- Switch “Front page displays” to “A static page”. Go to Customize -> Static Front Page and switch “Front page displays” to “A static page”.
- If you’re redirected at any time, Go Back To Appearance –> OnePressTheme
One Click Demo Import
Now that you’ve completed all the required actions(except one – change homepage page template), the next step is to Click on the “One Click Demo Import Tab”
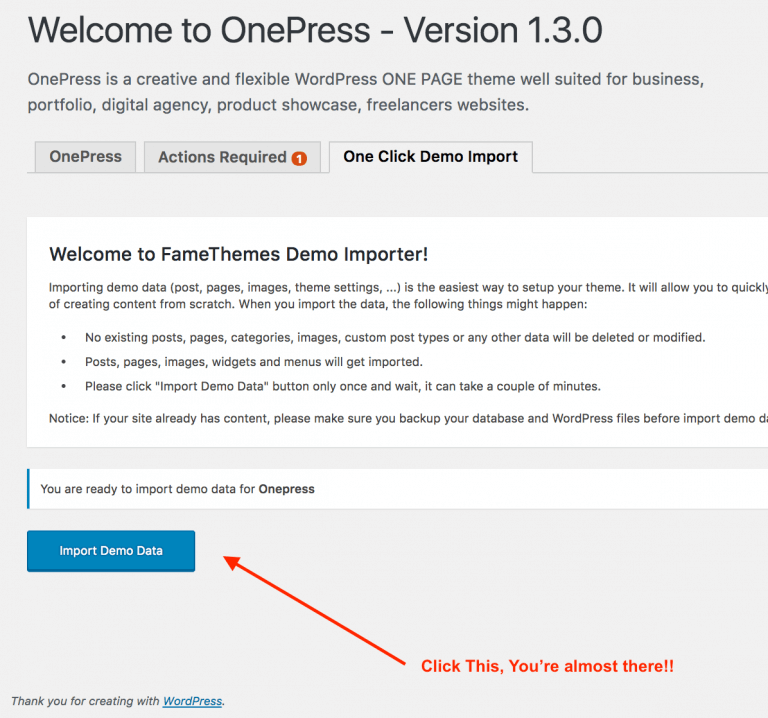
Now you can go to your Website in Chrome or Safari and take a look, it should look exactly like the OnePressTheme!
All we have to do now, is customize the Words, Menus, Logo according to your new business, and you’re all set to go!!
To Edit Your Home Page, Go to Appearance –> Customize
To Edit Menus, Go To Appearance –> Menus
Remember to publish your website(make it live). I’ve included a screenshot of how to do it below.

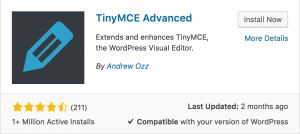
Important Plugins to Download before you start editing your pages: (Don’t download the wrong ones, follow my images for reference)
Go to Plugins — > Add New
TinyMce Advanced
Duplicate Post (Duplicate Your Page and Learn On The Duplicate Page before Touching The Real Page)
Yoast SEO Plugin (This is by no means a Comprehensive SEO solution, but it will introduce you to SEO Basics)
For Any Further help about OnePress Theme, check out their documentation here with Full Instructions.
For Free, high quality stock images, go to Pexels or Pixabay.
If you’ve followed every step, you should have a Website Design that looks like this.

Conclusion
By now, you should have a great looking website that you can use for your new business or blog.
We hope you’ve managed to stick with us to the end of this guide, and TOOK ACTION.
If you didn’t take any action, you can always refer back to this guide again in the future.
Don’t have time for all this and prefer to leave it to the experts?
Contact Us to see how we can help you to design and build an amazing Website, and grow your business online by monetizing your new website.


